I'm guilty! Guilty of neglecting my 617 crazy-pano film camera for a modern digicam.
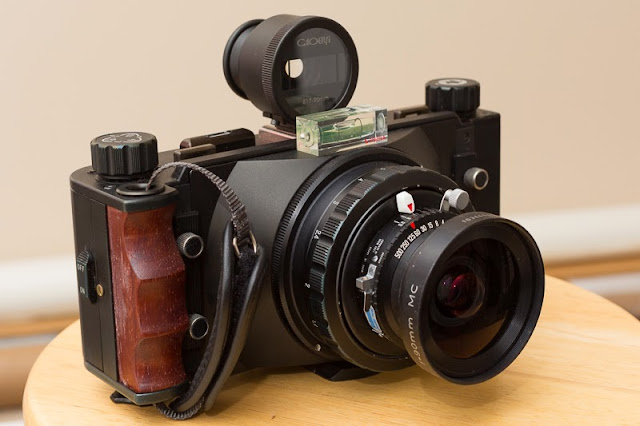 |
| Gaoersi 617 Medium format film camera with 90 Schneider lens. |
Look at the wooden grips, the metallic sound of the mechanical shutter, the gorgeous optics! What have I done? What is my sentence? I beg you to be merciful! '...Your sentence is the following...'
You will save around 50-80 bucks in color film processing fees!
You will also spend about 10 hours quality time doing whatever pleases you since you're not scanning!
You will also suffer the consequences of being able to work on your picture right away!
?!
I've always loved the pano format. Especially the 617 medium format film cameras. The image quality is just wonderful. But to be honest, I've been shooting this camera less and less. As a working professional, time is very important to me. Spending days scanning on my Epson 750 Pro has just become too much. I like to multi pass the scans at high resolution, so it does take awhile. Not to mention dusts, cutting negs, sleeving… man, I've become so lazy.
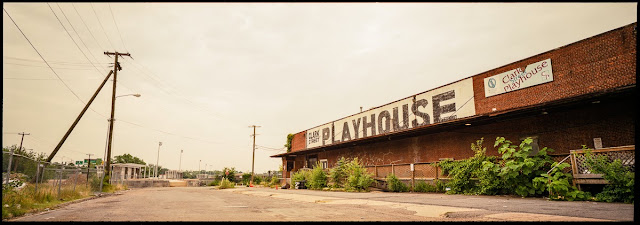 |
| Gaoersi 617 Medium format with 90mm Schneider. Fuji NPC 160. |
So I was pondering a way to get a nice high res panoramic image without spending a fortune on large format scanning backs or the dedicated pano camera that goes for $38,000! (Setiz 6x17).
Sure, stitching from my 5D MK3 is an option, but I never really liked the fact that you just cut off the edges after you've merged the photos together. If you want to do huge wall prints, any pixels you throw out haunts you at night. The reason behind why you lose resolution is when you pan the camera for the left and right parts, the perspective changes slightly, and that slight change in perspective is enough to make the outer edges not even, where you will need to crop out later for a clean rectangular format, thus losing image quality. Not to mention composing will be more of a guess out in the field.
This is where my 24mm L TSEII lens comes in!
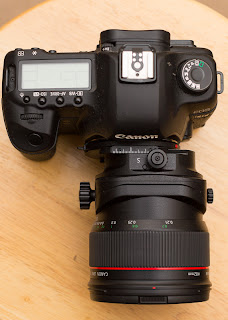 |
| 24mm TSEII shifted to right |
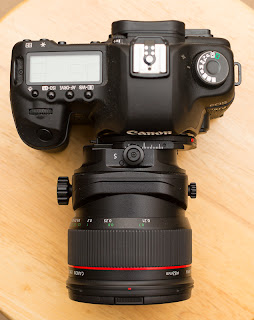 |
| 24mm TSEII shifted to left |
Technique
The TSEII lens allows the entire lens elements to shift and tilt to allow the photographer to change how the image hits the sensor. It allows similar movements that a large format view cameras are capable of. The above images shows the lens shifted right and left. It is capable of more movements, but I will only talk about the shift movement since that is what is being used for the pano stitching.
To put it simply, when I shift the lens to the left and then right to take each side's picture, it allows the camera body to remain still (no panning) on the tripod, so the perspective of the camera does not change. So by shifting the lens left or right, you are able to see the sides without turning the camera. You'll find that using this lens and technique, that you will not need to crop out any part of the image. What you've shot, you will keep it all! Actually, you do need to crop just a hair sometimes because of slight shift of the tripod/head when you touched the lens to shift the lens from one side to the other.
I've found that setting up the tripod, leveling the camera (built in level) and firing off two shots with the lens shifted left then right, is pretty painless process. To compose, just shift the lens left to compose the left side of the composition and then shift the lens right to see the right side of the composition. After you are happy with what your composition looks like, go ahead and shoot the two images.
You'll need to shoot in manual mode and keep the same exposure for both sides so they will be seamless. Use the histogram to carefully see if both sides of the composition is within the range of acceptable exposure.
I always shoot left then right. This keeps me from confusion when I import the images into the Lightroom.
Post Processing Workflow
What I do is I work the image in Lightroom. I work on one side first then I copy the settings and paste to the other side. Keeping it exactly the same is the key here. I also lighten the outer edges (left corners of the left composition, and right corners of the right composition). I do this because there is a natural light fall off when the lens is shifted to extreme sides.
Once it is worked in lightroom, I "edit in" Photoshop (CS5.5). I simply use Photomerge under File/Automate/Photomerge and use "reposition" setting. If you were NOT using this shift technique, you would use the "perspective" setting. Once you click ok, you should have a very high resolution panoramic image that you have composed accurately (because of no cropping needed).
With this combo, you still can't shoot things that are moving, nor can you shoot handheld. Maybe that's my sentence of not shooting a real "one shot" pano camera. But as I've mentioned before, choose your weapon for each battle! if you're shooting trees without legs or river that been there for half a million years, you don't have to worry about things moving.
So far, this is only way that makes sense to me to shoot high res digital pano with ability to accurately compose each shots. Any other ideas are welcomed. Side note: After stitching the images, the pano ratio is 6x15 not quite as wide as the 6x17… but not stubby as 6x12.


Comments
Post a Comment